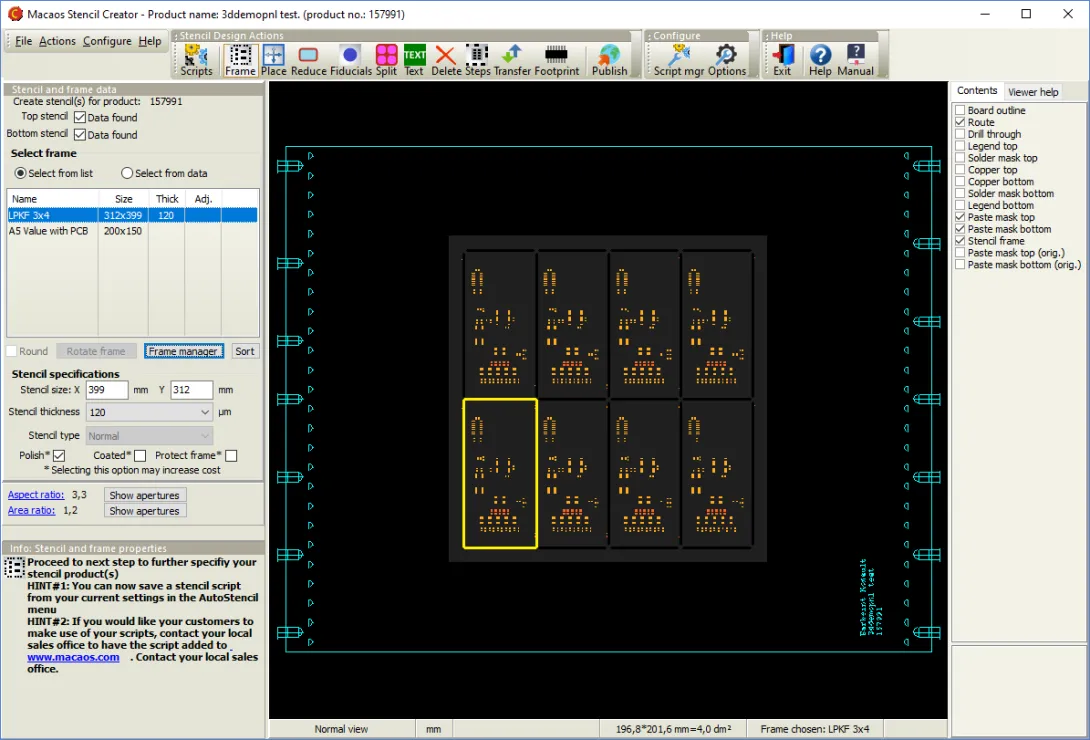
A solder paste stencil is used to apply solder paste to the surface mount pads of a PCB. Typically, a stencil is stretched over the PCB so that the correct quantity of solder paste may be placed on each pad. The amount of solder paste is a function of the stencil opening size and the stencil thickness. Often, openings in the stencil are reduced, relative to the copper pad size, by some percentage so that the correct amount of solder paste will be applied to the pads.
Note: This module is only available in Macaos Enterprise for Engineers and Macaos Gallery.
You can use the Stencil Module to create solder paste stencil product(s) either by extracting the paste mask data from an existing PCB product, or by importing the data from a Gerber file.
Graphic display
The graphic region displays the stencil. The check boxes in the layer list control which layers are visible.
See product viewer for an overview of viewer functionality such as pan and zoom, display modes, mirrored and rotated view, and measurement.
Select and modify operations
Use the left mouse button to draw a selection rectangle around the openings to select. Only openings on the chosen layer are selected. There are five selection modes:
- Select selects all of the openings within the selection rectangle. All openings outside the rectangle are deselected.
- Select similar selects all of the openings that have the same aperture definition (D-code) as the selected opening. All other openings are deselected. You may only select one opening.
- Selection add selects all of the openings within the selection rectangle without deselecting any previously selected openings.
- Selection subtract deselects only the openings within the selection rectangle, leaving the remaining openings selected.
- Selection clear deselects all selected openings.
Panelized products
When working with a regular array of a single product which has been created by the Macaos Panel Module, then the lower left board in the panel will be highlighted with a yellow rectangle. In most cases, an action performed within the yellow rectangle will automatically be duplicated to all of the other boards in the array.
This applies to the following actions:
- Shape manipulation: Selective adjustment of opening size
- Fiducials: Manual fiducial selection
- Split or edit openings
- Edit shapes width/height
- Delete objects
- Reduced thickness (stepped) regions
- Transfer objects from other layers
Creating stencil products
Use the following procedure to create a solder paste stencil:
Locate the PCB product. Select the product in the product browser and then click on the Stencil button to open the Stencil module.
Macaos Enterprise for Engineers: If you wish to create a stencil product directly from Gerber and/or DXF files, then click on a folder name (so that no product is selected) before clicking on the Stencil button.
Macaos Gallery: If you wish to create a stencil product directly from Gerber files (rather than from an existing product), then you must use the Operations|Create stencil from Gerber files menu command to open the Stencil module.
- Run an Autostencil script (optional). If deisred, select a script from the Autostencil menu. After running the script, skip to step 7. See the Autostencil section for more info.
- Specify side(s), frame and stencil properties. Use the Stencil and frame data design action to specify the side(s) to use for the stencil, select a frame and specify stencil properties.
- Specify board placement. Use the Placement design action to specify the placement of the data within the frame.
- Adjust the size of openings. Use the Shape manipulation design action to specify opening size adjustments and corner rounding.
- Define fiducial marks (optional). Use the Fiducials design action to detect or define fiducials marks.
- Modify the shape of openings (optional). Use the Split openings design action to modify the shape of an opening or to break a large opening into a pattern of smaller openings.
- Add text to the stencil (optional). Use the Text design action to specify the product's name and description, and place text (if desired).
- Delete unnecessary objects (optional). Use the Delete objects design action to delete any unnecessary objects from the stencil data.
- Create stepped regions (optional). Use the Reduced thickness regions design action to define regions of the stencil that should be thinner than the rest of the stencil.
- Extract data from other layers (optional). Use the Transfer objects design action to copy objects from any other layer to a stencil layer.
Publish or save the stencil product.
Macaos Enterprise for Engineers: Click on the Publish button to create the new paste mask stencil product(s). By default, a stencil product is created with the same product number as the PCB product, plus pt (for top) or pb (for bottom) or just p (for both). If the paste mask product already exists, then the new product will be given a new product number (plus pt, pb or p).
Macaos Gallery: Click on the Save stencil button to create the new paste mask stencil product(s). By default, a stencil product is created with the same name as the PCB product, plus pt (for top) or pb (for bottom) or just p (for both).


