A multi-product panel may be easily created by simply choosing compatible products from the product chooser and placing them at the desired location in the panel.
Product chooser
The Product chooser works in a similar manner to the Macaos Enterprise Product Browser. It lists folders and products which are compatible with the panel's initial product.
The # column lists the quantity of each product in the panel. For a detailed view of a product or its specifications, right-click on the product and choose View product details to open the product viewer
Check boxes at the bottom of the product chooser are used to specify how strictly the products are checked for compatibility.
- Match stackup: If checked, then only products having the same buildup will be listed. Otherwise, all products with the same number of layers will be listed.
- Match colors: If checked, then only products having the same surface finish, soldermask color and legend color will be listed. Otherwise, products will be listed regardless of surface finish or color.
By default, the product chooser is hidden, since it uses valuable graphic display space. Use the Configure|Product chooser menu command or press Ctrl+R to show or hide the chooser.
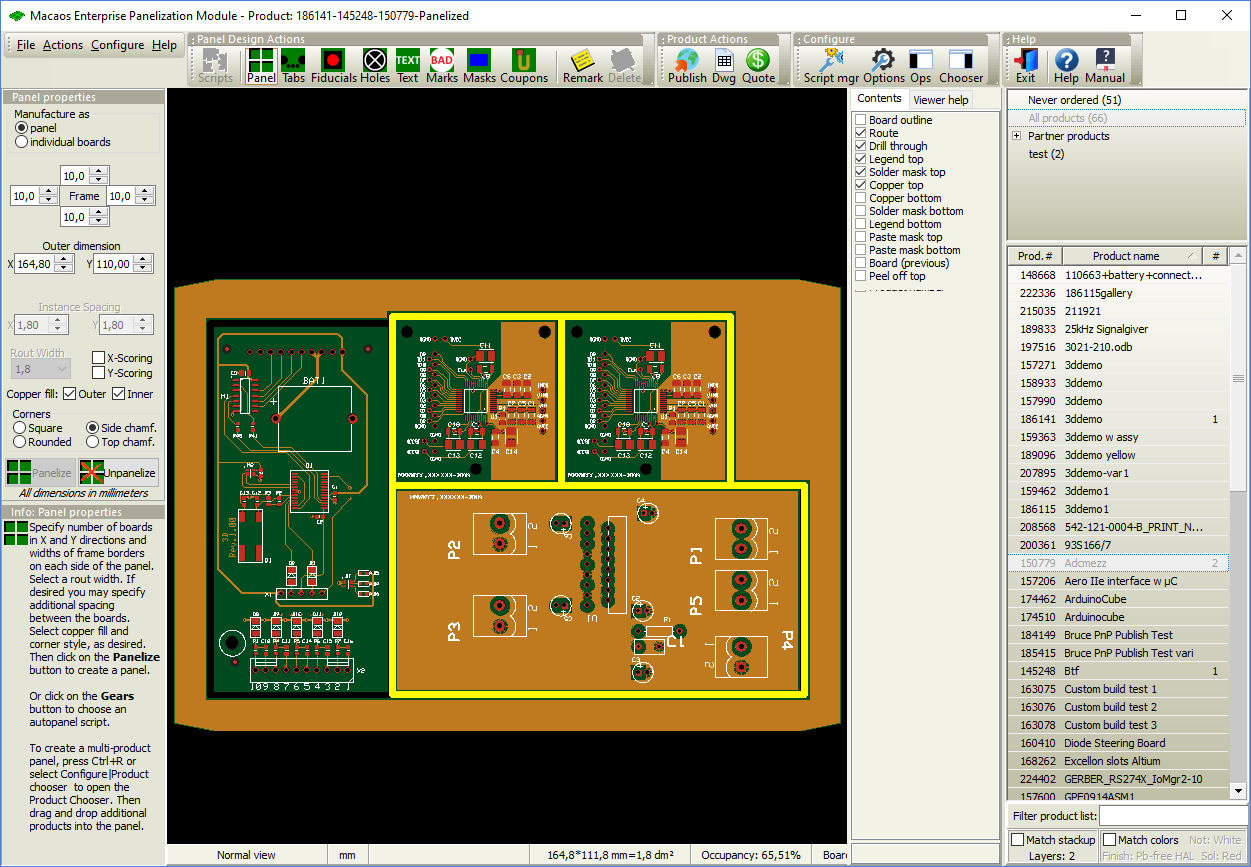
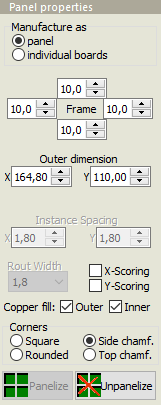 Panel properties for multi-product panels
A multi-product panel may be manufactured either as a panel or as individual boards, as specified with the Manufacture as radio buttons. When individual boards is selected, there is no frame and there should be no break-off tabs between the boards. When panel is selected, the panel frame and corners may be freely specified. Each board in the panel should have break-off tabs on at least 3 sides.
Due to the complexities that can arise with many different products on a panel, there are limitations on some of the panel properties. The route width must be specified prior to adding a product to the panel. Instance spacing is ignored, since boards are placed manually.
Scoring may only be added in cases where all boards in a row (or column) have the same height (or width). It is not possible to select or move boards once scoring has been specified. Therefore, all boards should be placed prior to selecting X-scoring or Y-scoring. After scoring has been chosen, a board may be rotated 180° by pressing the Space key while the mouse pointer is within the board to be rotated.
Working with multi-product panels
A board may be added to a panel by either dragging the product from the list into the graphic display, or by double-clicking on the product in the list. The new board becomes the active board and is highlighted with a white border.
Note: It may take some time to download the graphic data for the product you are adding to the panel, so after dropping a new product into a panel, you may need wait until the data is loaded before you can move and place the board.
The active board follows the mouse pointer until it has been placed. The Panelization module has a snap function that prevents you from moving a board over an already placed board or frame object. It also snaps the edges of the active board to align with edges of placed boards. This may lead to some confusion when you first bring a new product into a panel, since the board may seem to be locked outside of the panel. The easiest solution is to simply place the board where it is, and then after the panel (and zoom) automatically resize themselves, you can move the new board to where you want it to be placed.
While a board is active (white border), the following operations may be performed:
- Space Pressing the space bar rotates the board 90 degrees around the mouse pointer.
- Shift Pressing Ctrl deactivates the auto-snap functionality as long as Ctrl is depressed.
- Left-click Clicking the left mouse button places the board at the current position.
- Del Pressing Del deletes the board from the panel.
- Esc Pressing Esc aborts the current operation. For a new board, the board is deleted. For an existing board, it is returned to its previous position.
- Right-click Clicking the right mouse button aborts the current operation.
To make a different board (or boards) active, draw a selection rectangle around any portion of the board's outline. To add a new copy of an existing board to the panel, press the Ctrl key while making the board active.
Each time a board is placed, the panel is resized using the frame widths specified on the Panel Properties page. The panel size and area are shown in the bottom left corner of the window.
A board may be rotated 180° or flipped top/bottom in its position by pressing Space (rotate) or Shift+Space (flip) while the mouse pointer is within the board.
When viewing a multi-product panel, an additional Product number layer shows the placement and product number of each board in the panel. This layer is for documentation purposes only and may not be exported as a manufacturing layer.
The status bar at the bottom of the graphic display shows information about the active board. This information includes the product number, board size, rotation and number of break-off tabs.
Note: All boards should be placed in their final positions prior to placing tabs, holes, text, etc.