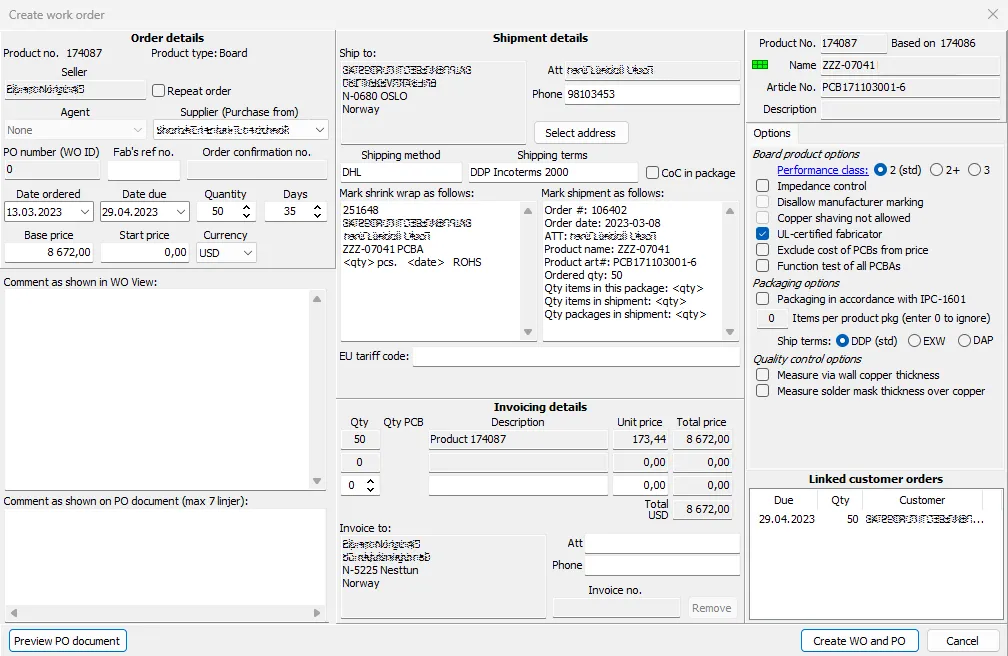
Right-click on a customer order or an RFQ to create a work order (WO). If desired, multiple customer orders may be combined into a single WO, provided that they all have the same product and delivery address. If the WO is created from an RFQ, then the user must select one or more customer orders which will be linked to the WO. The linked orders are shown in the lower left of the dialog box.
Check that the order, shipment, and invoicing details are correct, and make changes as necessary.
Product and order comments are automatically imported and listed in the comment text boxes. These should be reviewed and edited to remove any info which should not be forwarded to the supplier.
There are two text boxes for comments. The upper box is for work order comments as they are displayed in the Work Orders view. The lower box is for comments as they are written on the PO document. Although these will usually be the same, this approach enables differences when necessary. Right-click on a text box to make commonly used changes to the text.
A number of options may be specified for the work order. These include IPC class, impedance control, various packing options, and more. If the work order is created from an incoming order, then any options specified in the incoming order will automatically be selected for the work order.
If COC in package is checked, then a message is displayed in the Pack/Ship module.
Once everything has been specified, click View to review the PO document. Finally, click Create WO and PO, to create the WO and upload the PO document.
If there are multiple customer orders, then the user may choose to create separate WOs for each of the customer order. If this is chosen, then the user is given the opportunity to modify factory prices (if necessary).
Note: When editing a WO, the PO document will only be updated if Regenerate PO is checked.
Once the work order and PO have been created, any RFQs for the product or order may be closed, notifications may be sent to other suppliers, the Init milepost (in the Status view) will automatically be signed, and the dialog box for the Send milepost will automatically open.